Start with a question you can test
A cup of water left out may seem to lose water even when nobody touches it. Where does that water go? This experiment lets children compare an open cup with a covered one and look for clues. The aim is not to make the water disappear quickly. It is to notice small changes and think about what might explain them.
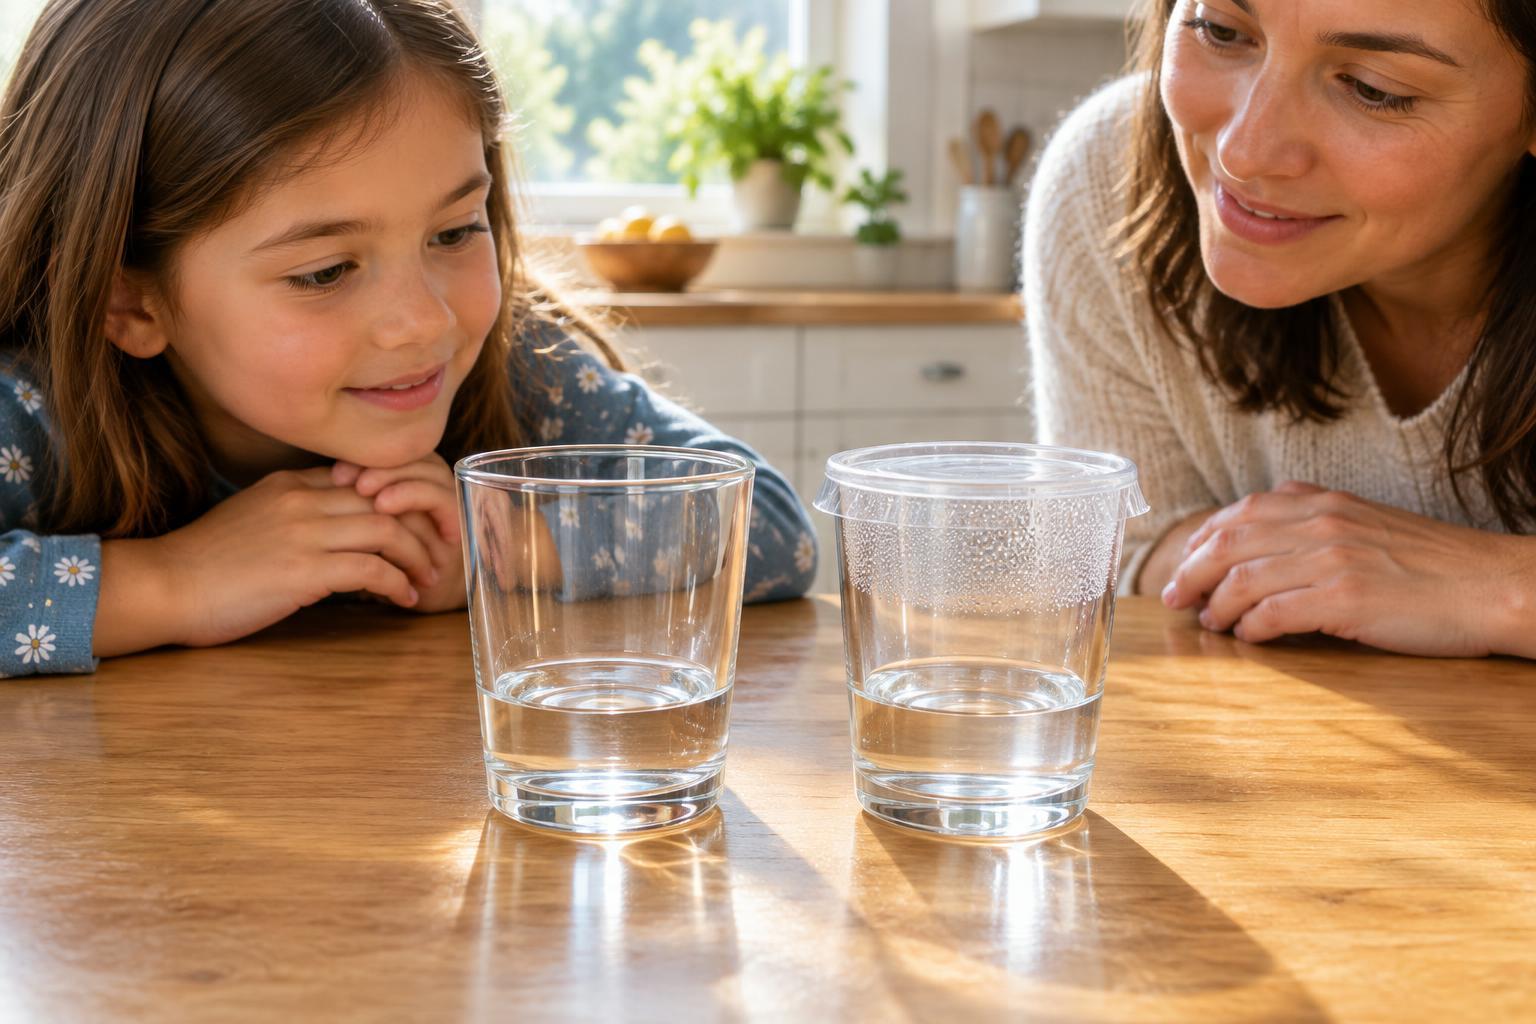
Gather two matching clear cups, water, a transparent cover such as reusable wrap or a small clear plate, a washable marker or two strips of tape, and a notebook. Choose cups that are unlikely to tip, and set them where they will not be mistaken for drinking water. An adult can help with the cover and cleanup. Room-temperature water is enough; there is no need to heat it.
Make the comparison fair
Pour the same amount of water into each cup. If the cups have straight sides, mark the starting water level on the outside of each one. If the sides slope, place a strip of tape beside the water line and draw a small mark on it. Label one cup “open” and the other “covered.” Cover just one cup, making sure the cover rests securely without touching the water.
Put the cups side by side on a level surface away from curious pets and accidental bumps. Keeping them together gives them roughly the same light, temperature and airflow. Ask children to predict what they might see after a few hours or the next day. Will the water levels change by the same amount? Might anything appear on the underside of the cover? Record their ideas before checking.
Try not to move the cups between observations. Look at them at about the same time each day and note the water levels, any droplets on the cover, and any spills or disturbances. Drawings can capture details that are hard to describe. If the change is too small to see at first, leave the cups longer rather than adding heat.
Follow the water you can and cannot see
Water at the surface of each cup can become an invisible gas called water vapor. This process is evaporation. In the open cup, some vapor mixes with the air around it and can move away. Over time, the water level may fall. How quickly that happens depends on conditions such as temperature, airflow and moisture already in the air.
Water can evaporate in the covered cup, too. But the cover makes it harder for vapor to move away. Some vapor may meet the cover and turn back into liquid droplets, a process called condensation. Those droplets might cling to the cover or fall into the cup. Children may be surprised to find water above the water line; it has changed location and form rather than simply vanishing.
The covered cup may still lose a little water, especially if its cover has gaps. The open cup may show only a slight change during a short observation period. Treat either result as information. Ask, “What did we actually see?” before deciding what it means. This helps separate an observation, such as “there are droplets under the cover,” from an explanation, such as “water vapor cooled and became liquid again.”
Turn observations into a conversation
At the end, compare the marks and notebook entries. Which cup’s level changed more? Did the droplets appear before a clear difference in levels? Was the cover dry every time? If a cup was knocked or its cover slipped, note that too. An imperfect test can still teach children why scientists pay attention to their setup.
For a follow-up, repeat the test with two fresh, matching cups in another safe spot and compare what you notice. Change only one condition at a time when possible. For example, you could compare a place with gentle airflow to a more sheltered place, while keeping the cups, starting levels and covers the same. Avoid direct sun if it makes the cups hot or easy to tip.
The idea reaches beyond the kitchen table. Puddles can shrink after rain, damp sidewalks can dry, and droplets can gather on a cool window. On a neighborhood walk, invite children to notice where water remains and where it has gone. The cups offer a small-scale way to ask the same question: where might the water be now?